Written by J.B. Shepard, a professional pet photographer and founder of the Puptrait Studio.
If you’re a dog lover, chances are you’re taking lots of photos of your favorite mutt. But if you want to step up your dog’s selfie game there are few basic techniques and tricks that you can use to dramatically improve the quality of your photos.
The good news is, these five photography techniques are actually so simple to implement that they don’t require any special equipment, lenses or lighting. In fact, most of what I’m going to show you next will help you improve your at home dog photography even if your camera happens to be an iPhone.
Remember: Good Photos Are Typically Simple Photos
If you want to take better picture of your dog, unclutter the background.
I can not stress this enough. Remove anything from the scene that might be distracting. As a general rule of thumb, if an element isn’t adding to the composition it should be removed. It’s a simple idea. But one that can make an absolutely huge impact on your photography.
Below are 5 ways you can easily remove distracting elements from your dog portraits without the help of Photoshop.
1) Fill that Frame!
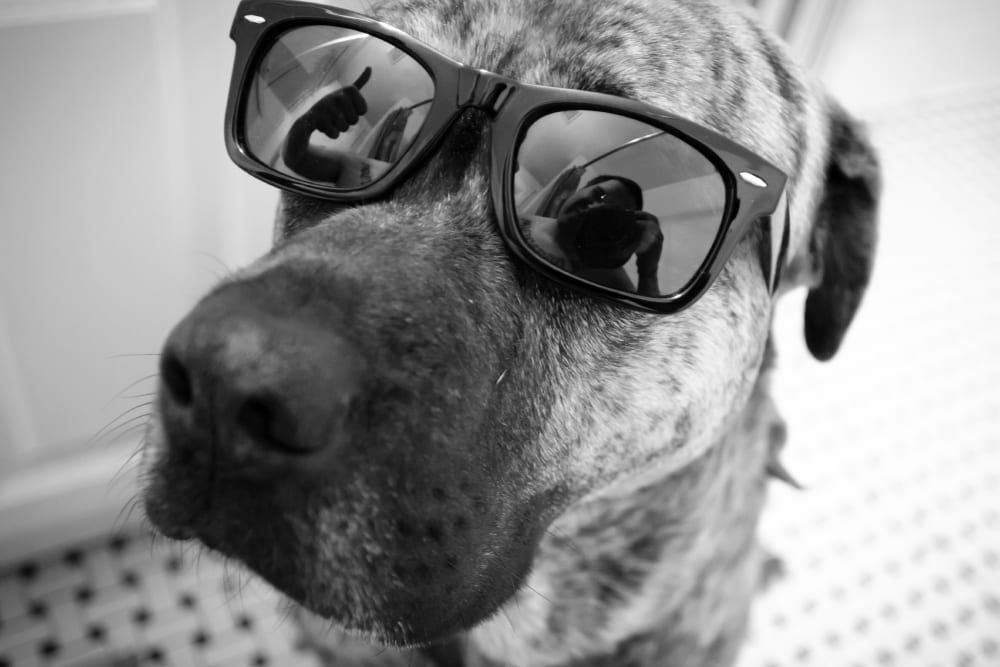
Getting close to Blackjack here puts the emphasis on his sweet sunglasses, rather than the sad looking bathroom floor in the background or the weird bendy arms of the chubby shirtless fella giving a thumbs up in the reflection (that’s the author FYI).
This is a great technique to use if you’re shooting with a cellphone. Get up close and personal, and let your dog’s face take up as much space as possible in the scene. This will help you in a few ways. The most obvious of course being, if your subject is the only thing in the frame, it doesn’t leave much room for distracting elements. It will also allow you to make out more details when displayed in smaller formats, like on a mobile phone screen.
When using this technique make sure that you’re not too close to your dog, otherwise you may find focusing to be problematic. And while we’re on the topic, make sure you are focusing properly. As a general rule of thumb you want to focus on the point of interest closest to the camera. With pet portraits the “closest point of interest” is typically the left eye (that’s your left, or their right eye), as that is where humans (and dogs – true story!) tend to look first when they recognize they are looking at a face. That said, that’s not a hard rule and for a more creative take on your portraits, you may want to try focusing on your pet’s tongue, nose, ears or distinguishable features.
2) Break out the Bokeh!

Even a noisy, uninspired, poorly lit and asymmetrically cropped photo of your dog, if focused properly with a short enough depth of feel, might just be enough to convince your friends and family that your are infact a photographic genius – or more likely, it will inspire compliments as to how nice your camera is or inquiries into your camera’s make, model and cost. Either way, with that shot and a little luck, your college buddy might just toss you a few bucks to shoot their wedding. Creativity is pain, people – don’t say I didn’t warn you 😉
Bokeh comes from the Japanese word boke (暈け or ボケ), which means “blur” or “haze”, or boke-aji (ボケ味), the “blur quality”(Random fun tidbit – as I understand it, the word was purposefully introduced as misspelled to encourage American photographers to pronounce it properly). The term refers to the generally pleasant aesthetic of including heavily out of focus or soft elements in a composition. You may recognize the technique from it’s common use around the Holidays, when many photographers take out of focus photos of Christmas lights, which in turn become soft looking free floating multi colored disks. When used in portrait photography a shallow depth of field can help a sharply focused subject stand out against a soft blurred background – effectively washing out what otherwise be distracting elements.
There are a few ways you can narrow the depth of field in a photo. Macro and medium telephoto lens (85mm to 200mm) at their widest apertures (generally f2.5 and below) tend to do this naturally in most 35mm based camera systems, including most cropped or full framed DSLR cameras. This effect can be difficult to replicate with a mobile phone camera. Radial blur or tilt shift blur effects in most mobile applications tend to use Gaussian blur algorithms, which you may have noticed blur very differently from actual lens blur.
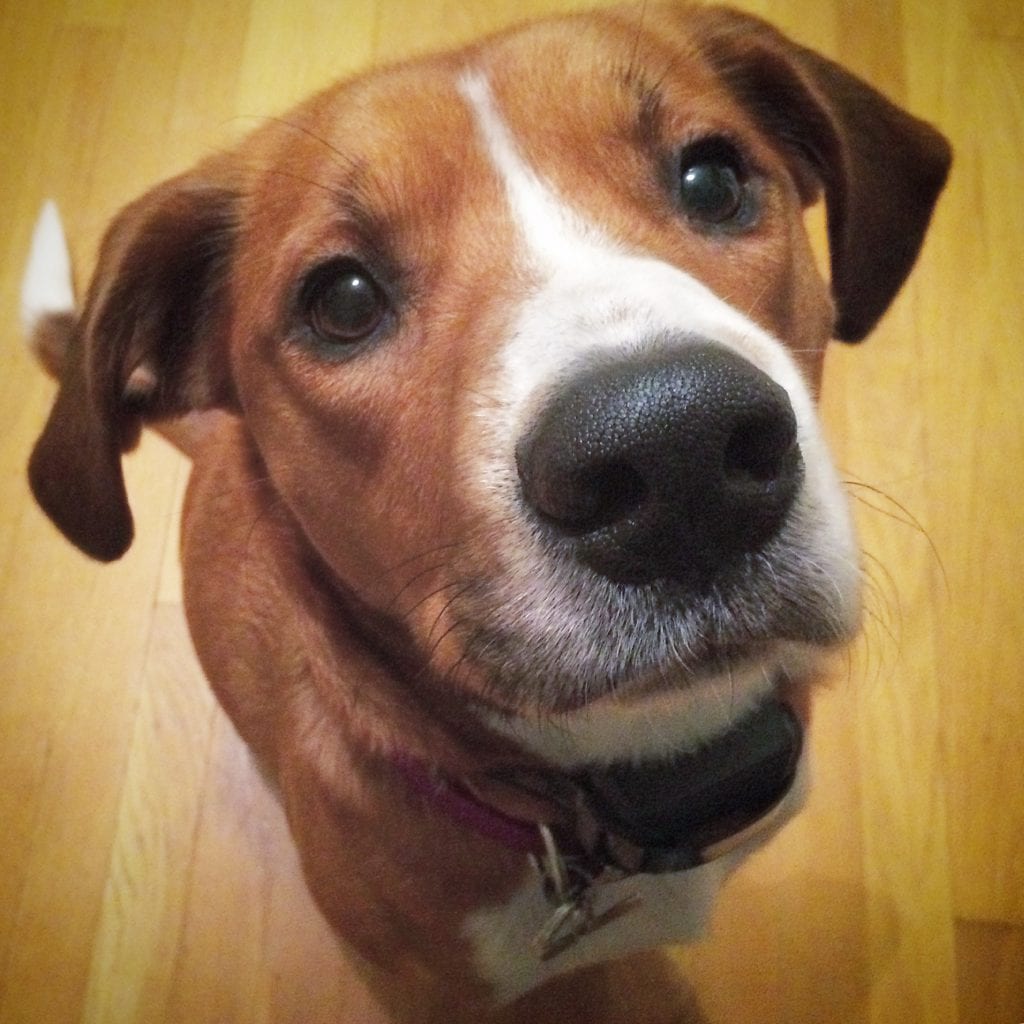
Captured with a mobile phone camera, George’s giant nose is an example of extension distortion. Be focusing on the shiny ridges on his now gigantic nose I’ve successfully tricked the camera into thinking the hardwood floor in the background is roughly forever away, effectively blurring it and rendering a sharp contrast in focus, lending an almost 3D effect.
But the concept of removing or downplaying distracting elements from a frame, still apply to shooting with a camera phone. To better accommodate selfies, camera phones almost exclusively use ultra wide lenses. Ultra wide lenses create what is called extension distortion, which (not unlike the rearview mirrors on your car) means that things are closer than they appear and things that are closer to the lens appear much larger than they are in reality. As focus and, in turn, depth of field are effected primarily by distance from the lens, it is possible to shrink the effective depth of field and create bokeh by focusing on elements in the frame that are exceptionally close to the camera and affected by extreme extension distortion. As far as the camera (or physics for that matter) knows, those giant looking elements are actually that close and your depth of field will respond accordingly.
In plain English, when shooting with a camera phone try focusing on something really close and the background, which will now appear relatively distant, will be blurrier in comparison.
3) Get Really High!
By shooting down, the ground creates converging lines and lends balance to the frame. True story – this image is actually one of my personal favorites. While it might not look like much, at least at a glance, there is a ton going on here compositionally.
You might be shocked how often this actually works. Turns out, most surfaces (at least the ones we tend to stand on) are relatively flat and void of clutter. Shooting down on a dog can be a great way to create a distraction free scene in a pinch. Find a high enough perch and encourage your dog to jump up at you, and you’ll find that your fun new action shots are automatically integrating the first two tips mentioned above – simultaneously filling the frame with your pup’s head and blurring the background.
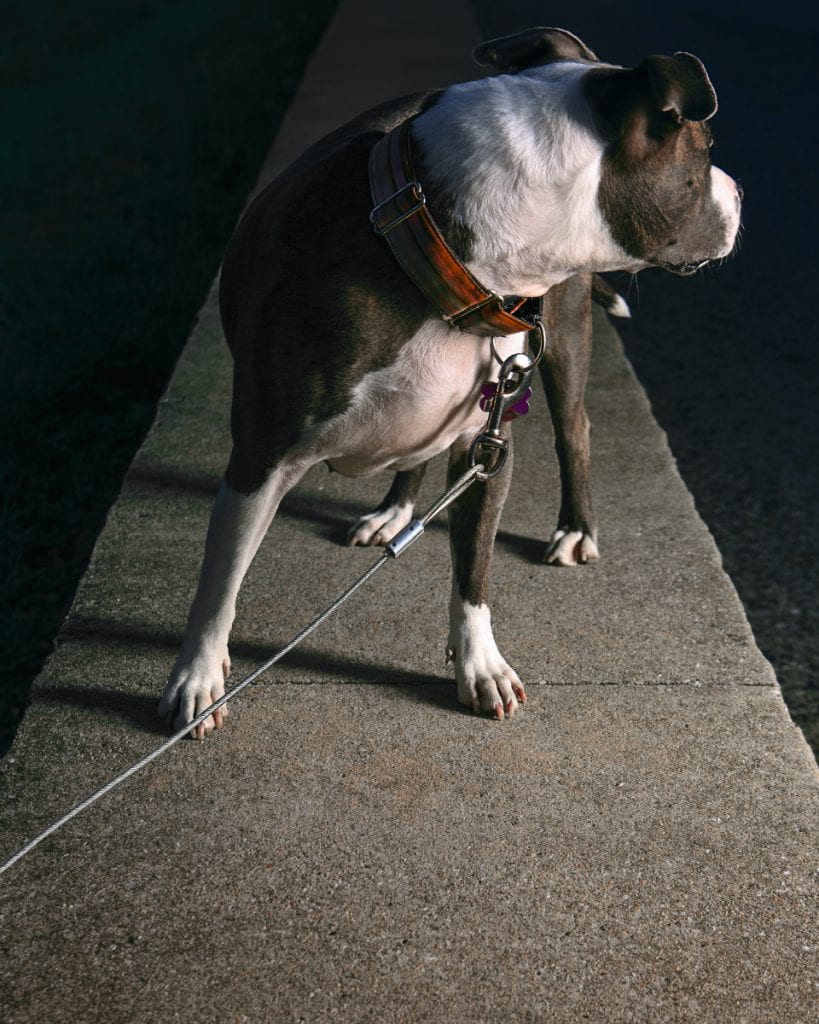
At less extreme downward angles, you may find that your new found background presents other compositional opportunities. In this scene here, our subject is standing on a long cement wall. As we would expect from the basic rules of perspective, as the wall gets further away the edges of the wall increasingly converge. The resulting effect is a triangle, lending an aesthetically pleasing sense of balance to the frame.
4) Highlight for Emphasis!
There’s more to lighting than exposure, meaning secondary lights, strobes and flashes can do so much more than ensure that your photo “comes out”. Lighting can be used to help emphasize important compositional elements and highlight features that may otherwise not be so obvious and alternatively, it can be used to hide unwanted features, unsightly elements or things that would otherwise distract from your subject.
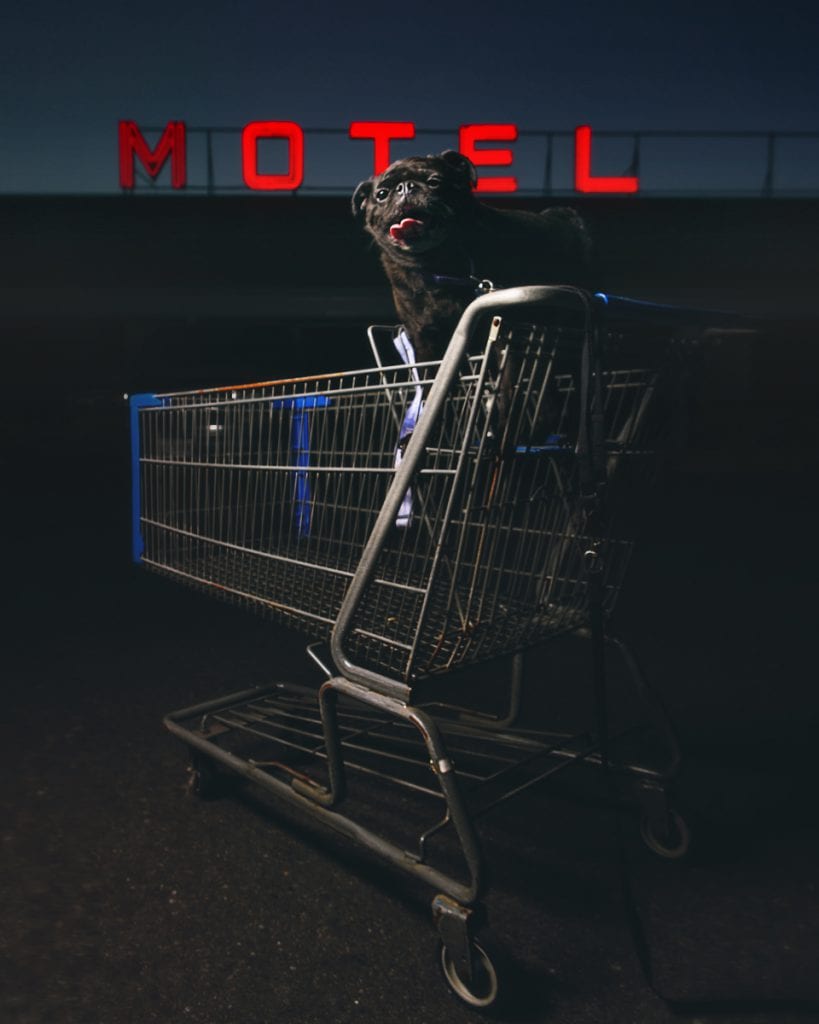
Through careful use of flash the cars in the background, who would otherwise be distracting, are barely visible in the final image.
In this example, we see a pug sitting in an abandoned shopping cart in front of a neon Motel sign. But if you look closely you’ll notice that this photo was shot in the parking lot for the motel and that there are actually cars and trucks lined up behind the subject. But since the shopping cart (lit by a stand held strobe) and glowing neon sign are so much brighter than the rest of the scene, the distracting elements are effectively muted.
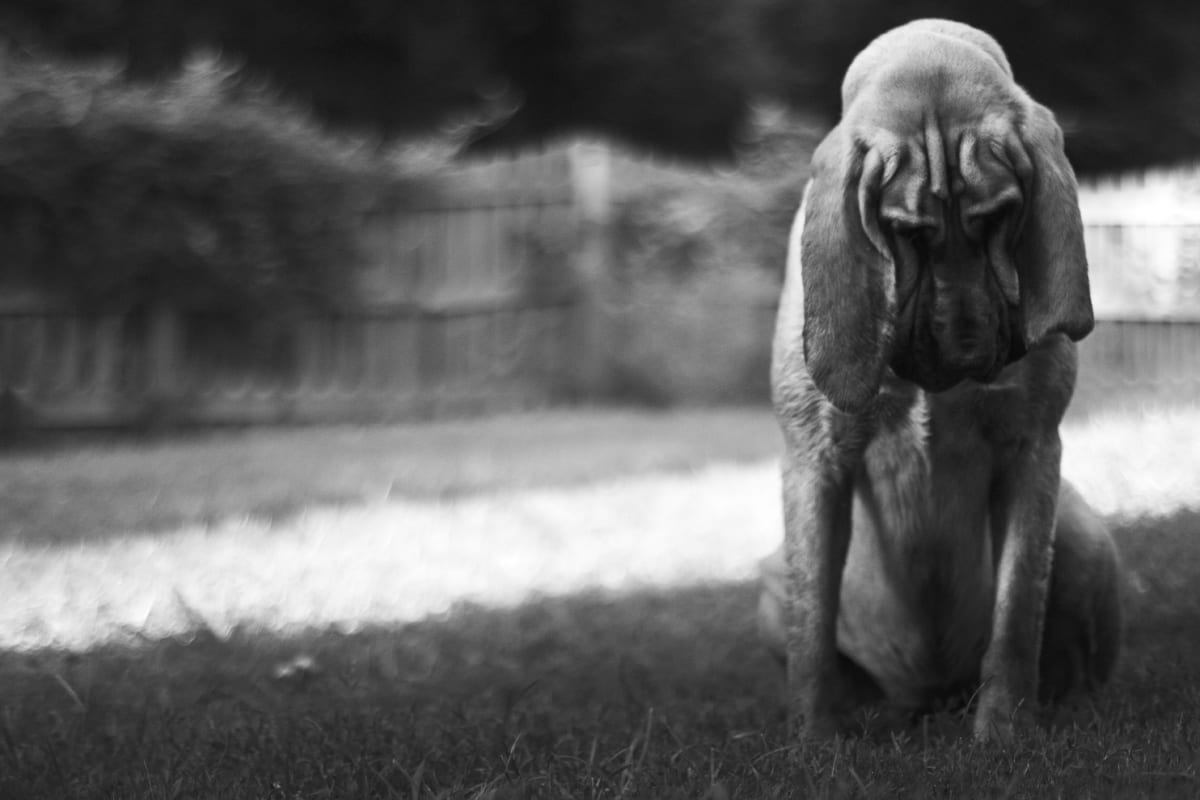
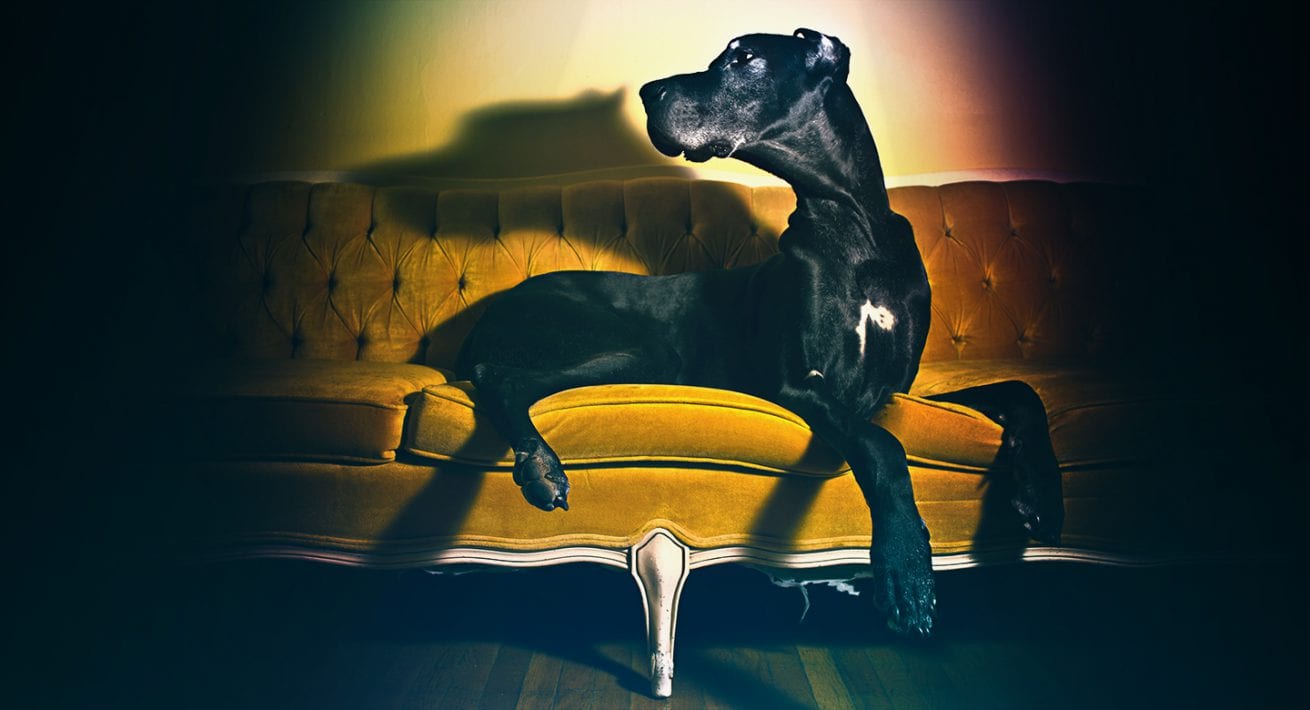
This naturally lit photos is actually one of the first I ever took with my very first DSLR camera. Everything in this shot – including exposure and focus was set to autopilot. All I did was ask the dog to sit where it’s head would rest in a sun beam – and the composition took care of itself.
While this example employed a high speed studio style light source, this technique can be applied with more simplistic methods, by either positioning the subject in a column of light (or in between shadows) or with a low powered directional light source, like a lamp or flashlight.
Quick mobile specific tip: When shooting with a mobile phone try to find a second mobile phone to use as a directional light source. Most modern smartphones come with a “flashlight mode”, where the LED flash on the device remains on at full power. While this won’t lend the same creative control an independent strobe might, at least when it comes to playing with synch and shutter speeds, it will allow budget conscious photographers to use light in more thoughtful ways. This can be a great hack for bringing that extra umph to environmental dog portraits, where the second phone acts as fill in what would otherwise be a naturally lit shot.
5) Look to the Skies!
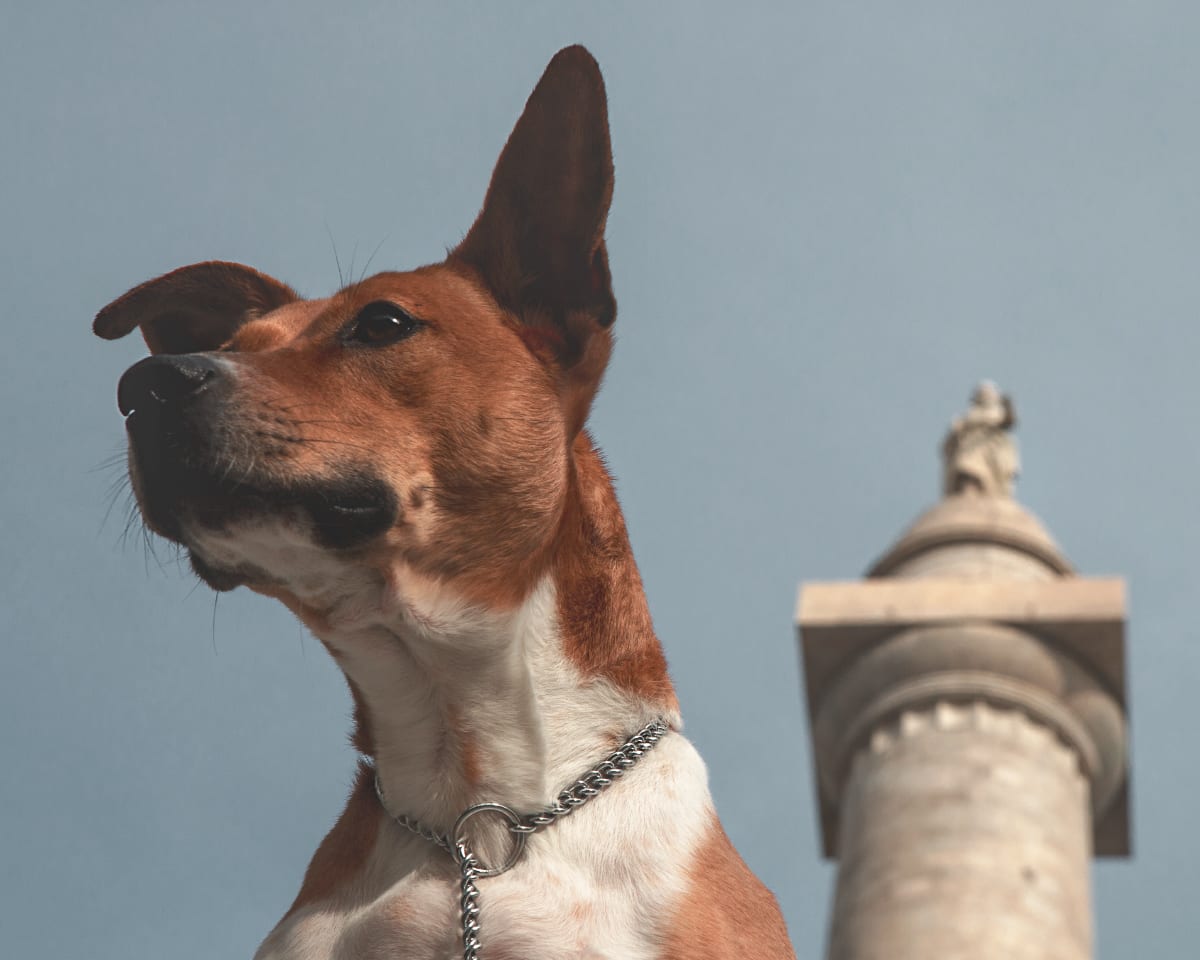
One of the many “throw away” Washington Monument shots that didn’t make the cut for the Mutts of Mobtown show. While not one of my favorites from the set, it is a great example of how with the right angle, even a not so inspiring shot, will still result in a pretty solid capture.
When all else fails, prop your dog up on a stool / hill / wall / car hood / or whatever you can fit your fur baby on and get low. The sky can make an amazing backdrop. On overcast days it’s virtually a blank, seamless canvas to play with and on cloudy or stormy days it’s a dynamic design element that could bring out a whole new theme or mood in your pet photo.
I’ve shot entire series with this method, including all of Mutts of Mobtown, where I propped untrained rescue dogs up on a $15 collapsible modeling stool, got super low and shot them with notable Baltimore landmarks up above and behind the dogs in the background. It was a super simple idea, but to date it remains one of my best selling series.
Now, I’m not saying you’re going to get the same kind of quality imagery yourself, as I am an experienced professional using professional gear, but that technique is the crux of the entire series and you might be surprised at how close you can get on your own with your own dog with only a stool, a cameraphone and a dash of cleverness. Of course… homemade and poorly crafted kitsch props like aluminum foil antennas don’t do much to hurt the cute factor.
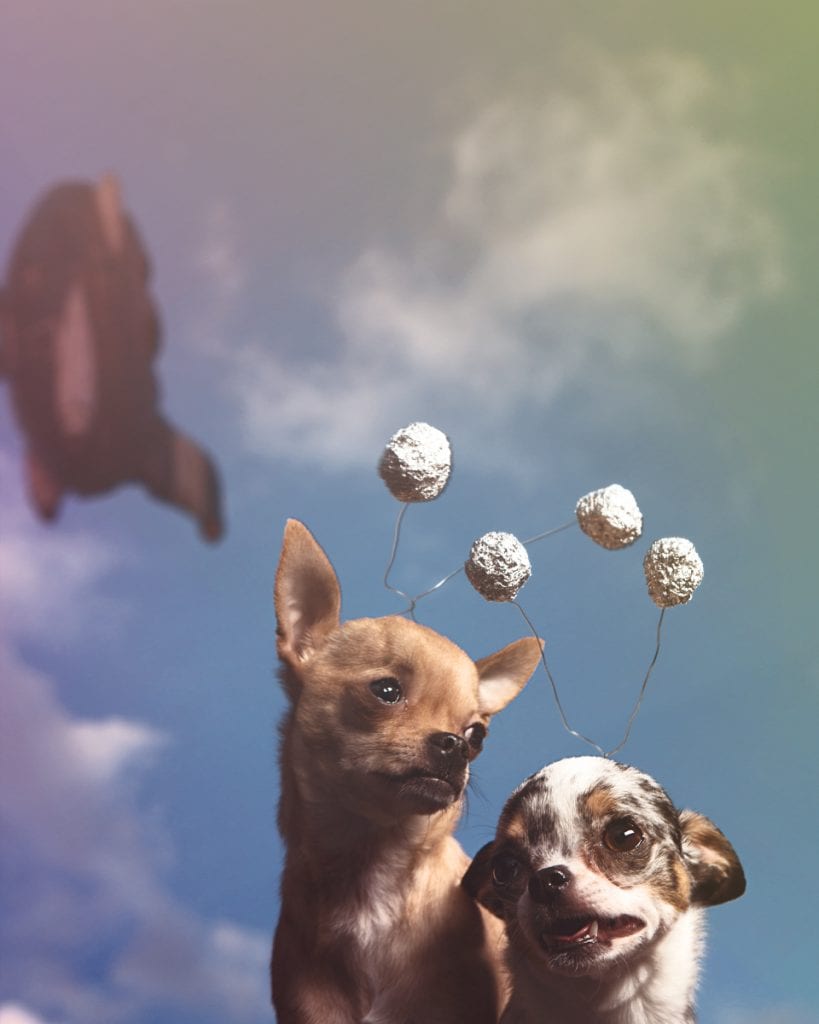
Many fans think it was added in post, but that rocket was actually caught in camera. The rocket is attached to one of our favorite local bar restaurants that just so happens to be located a block from our studio, called Rock to Venus. If you’re ever in the Baltimore neighborhood of Hampden it is an absolute must visit.
That’s it for today’s tips and tricks. I hope that helped! I invite you all to give them a shot yourself and let us know how it goes. Feel free to post your own DIY puptraits on our Facebook page. We would love to see them!

About the author: J.B. Shepard, is a professional pet photographer, dog advocate, and founder of the Puptrait Studio. J.B. lives in Hampden, with his wife and two rescue dogs — George (a Boggle) and Lucky (a Jack Russell Terrier).